If you're craving some AIP cookie dough or chocolate, this treat is for you. These yummy fudge cups are stuffed with cookie dough and topped with a luscious cherry layer. They're gluten-free, dairy-free, and fully AIP compliant.
I've been playing around with making a "chocolate" candy coating with carob powder, which is pretty new to me in itself. I wasn't sure I would like carob powder but it's delicious and hits the spot if I'm craving chocolate. It has more of a dark chocolate taste than a milk chocolate taste but luckily I'm a dark chocolate fan.
I tried making a bunch of different versions of these little cups. I made cookie dough sticks and I made them in other fruit flavors like dragon fruit, mango, and blueberry. I even layered all 3 flavors together. Those were pretty cool and I will probably post a recipe for them as well but I really wanted to make a cool cookie dough cup first.
I was happy with the "chocolate" and cookie dough components for these cups but still wanted to find a good fruit layer for it. I love how the cherry layer came together- it's smooth, sweet, and sets up really nicely. I was worried this layer would stick to the candy wrappers but it's not bad at all. Just peel them off slowly.
This recipe looks lengthy and requires several little bowls but it's actually relatively simple and doesn't take that long to make. I love recipes that don't require baking/cooking.
Also, the ingredient list looks long because each layer is separated into its own category step. Many of the ingredients are used in multiple layers so really you're only using a handful of ingredients.
**Just a quick heads up- this post contains affiliate links which means if you click on them and buy something, I will earn a small commission (at no additional cost to you) to help continue maintaining this site.
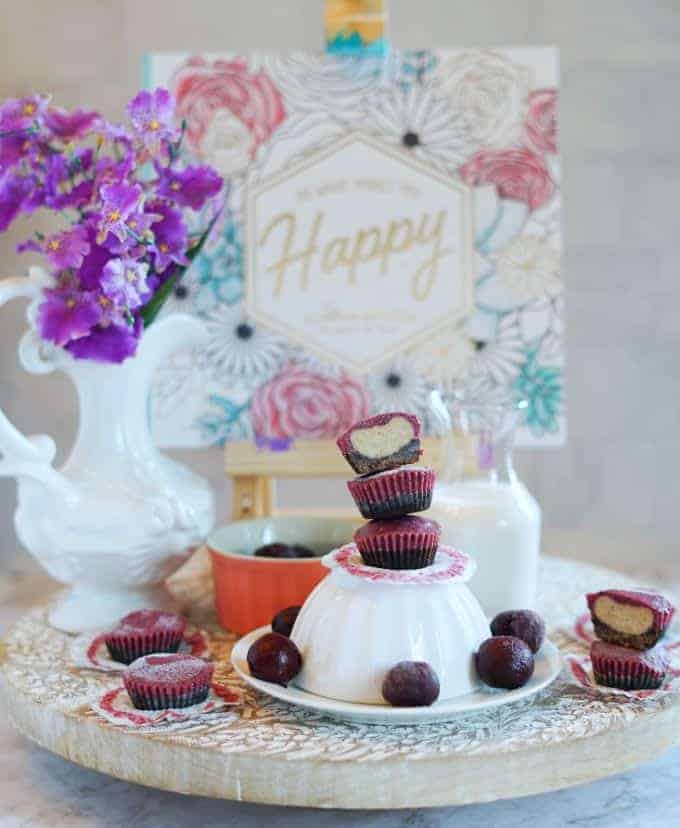
AIP Cookie Dough Fudge Cup Ingredients
- Coconut Butter- I finally broke down and ordered coconut butter from Amazon this past week because I wanted to expand my horizons with AIP baking and AIP food prep in general and I'd been seeing a lot of cool recipes that use coconut butter among other oils/fats. Coconut oil on its own just wasn't cutting it anymore. The difference between coconut oil and coconut butter is that in coconut oil, only the oil has been extracted from the coconut. With coconut butter, the whole coconut is pureed into a paste. I like coconut butter a lot because it's very rich and very solid at room temp, which is handy for making treats that have a good texture and hold together well. I ended up going with Kevala brand, which is organic and really good quality.
- Coconut Oil- Coconut oil is used in this as well because, in combination with the coconut butter, it makes for a slightly softer texture than using coconut butter alone.
- Carob Powder- Carob powder aka carob flour is a great cocoa alternative when you're on the AIP diet. It's got a slightly different taste than cocoa/chocolate but overall tastes pretty chocolaty. It comes from dried roasted carob tree pods and it's high in calcium, fiber, and antioxidants. I use Terrasoul brand and love it.
- Honey- Honey gives these just enough sweetness. You could probably sub in maple syrup if you'd prefer, though I haven't tested it yet.
- Tigernut Flour- This flour made from tigernuts, which are little tubers, not nuts functions almost like an almond flour, and has a great texture. It holds together really well in these little cups. Anthony's brand is good quality and pretty affordable.
- Coconut Flour- I just use a little bit of coconut flour in this recipe but it gives these a nice soft texture.
- Coconut Milk or Coconut Cream- Make sure it's guar-gum free. Here's a heavy coconut cream and here's my favorite coconut milk.
- Dark Cherries- These can be fresh or frozen. I couldn't find any fresh ones at my store this time so I went with frozen. If you use frozen, you will defrost them before putting them in the food processor
- Gelatin- This is important for holding everything together, especially the cherry layer because of its higher liquid content. It doesn't hurt that gelatin has such great gut-healing abilities as well. Try to use a good grass-fed gelatin. This is the one I've been using lately.
Tips/Notes
- Gelatin: When you mix the gelatin and water, make sure the water isn't too hot- this will cause it to clump up. I just use cool water, mix it quickly, and then add it to the mixture before it has a chance to harden.
- Blender or Food Processor: The cherry layer requires a small food processor or blender. It's a small amount of liquid you'll be blending/processing so I'm guessing it wouldn't work very well in a regular sized blender. If you're using a blender, I'd recommend a single serving blender cup (like you'd see on a Ninja or Vitamix) if you have it. I have a Vitamix and it is one of the best purchases we've ever made, but I don't have the single-serve adaptor kit yet (maybe for my birthday), so I just used the small bowl attachment that comes with my Kitchen Aid food processor.
- Little Bowls- It helps to have a handful of little bowls ready for this recipe since there are several steps requiring a small amount of ingredients. You can of course just use a couple of bowls and clean them out between steps but I just found it handy to use a stack of bowls so you can just grab them as you go.
- Measuring the Coconut Butter- Coconut butter is very solid at room temp and can be crumbly when spooning it out of the jar. This is annoying when you're trying to measure it out. Some people like to put the jar in warm water to soften the coconut butter which is fine but I don't have the patience for it, plus I wonder if it hurts the quality when you're repeatedly heating and cooling it. I prefer to use a digital food scale to measure out the weight I need. This is the one I have and I've had it for 7 years. It works great and it's only 13 bucks. I have the silver one but it actually comes in a bunch of really pretty colors.
To weigh your coconut butter with the food scale:
- Make sure the scale is set to grams.
- Set the jar of coconut butter on the food scale.
- Zero out the scale.
- Scoop the coconut butter out until the scale reaches the number of grams you're looking for. To find the number of grams you need, just look at the serving size on the nutrition label. Coconut butter weighs about 15 grams per tablespoon, so if you were trying to measure out 1 tbsp, you would stop scooping when the scale says -15 g.
Fudge Layer
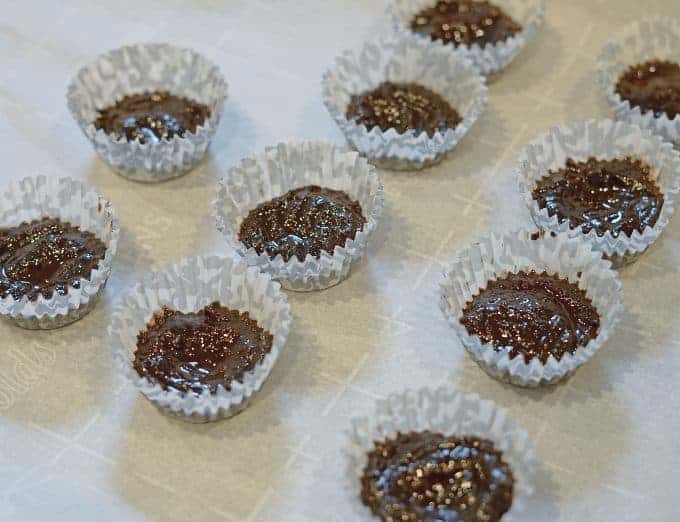
Cookie Dough Layer
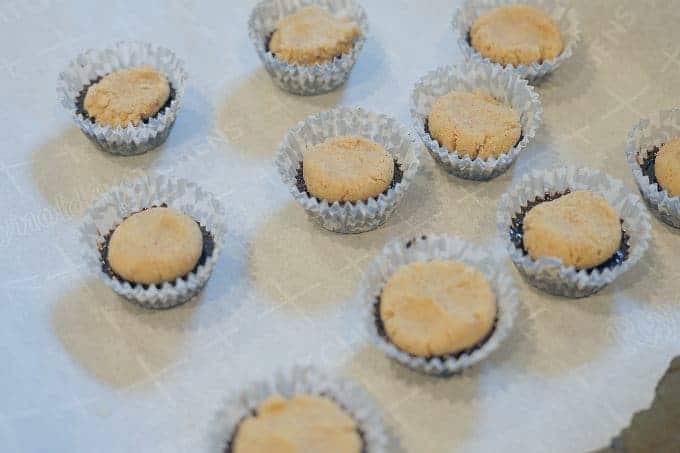
Cherry Layer
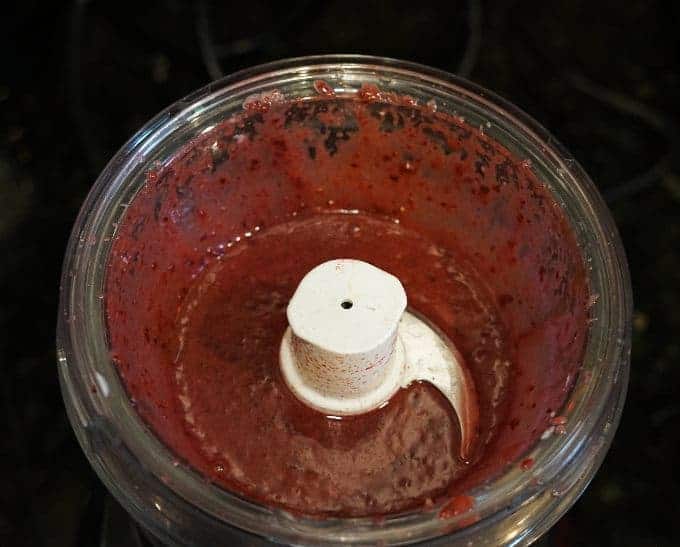
Storage
These can be stored in an airtight container in the fridge for 4-5 days or in the freezer for at least one month.
If you like this recipe, you may also like:
AIP Strawberry Rhubarb Muffins
Conclusion
I hope you enjoyed this recipe. If you made it, leave a comment below and let me know what you thought. I'd love to hear from you!
This recipe is shared on the Paleo AIP recipe roundtable.
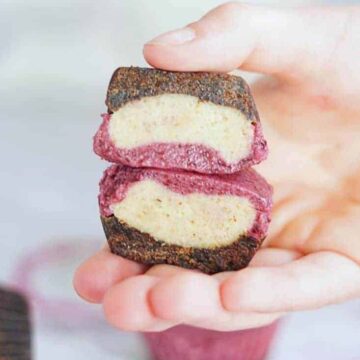
Dark Cherry Cookie Dough Fudge Cups (Paleo, AIP, GF, DF)
Equipment
- Food processor or blender
Ingredients
Fudge Layer
- 2 tbsp coconut butter
- 2 tbsp coconut oil
- 6 tbsp carob powder
- 2 tbsp honey
- 12-15 paper candy cups
Cookie Dough Layer
- 1/2 cup tigernut flour
- 1 tbsp coconut flour
- 2 tbsp full fat coconut milk or coconut cream
- 1.5 tbsp honey
- 1 tbsp water
- 1 tsp gelatin
Cherry Layer
- 3/4 cup sweet dark cherries (pitted, frozen or fresh)
- 2 tbsp coconut butter
- 1 tbsp coconut oil
- 1.5 tbsp honey
- 1 tbsp water
- 2 tsp gelatin
Instructions
Fudge Layer
- In a small bowl, combine the coconut butter and coconut oil and microwave until melted (about 45 seconds). Add honey andmix in. Add carob powder and stir until well combined.
- Spoon about 1.5 tsp of fudge mixture in to each candy cup and gently press the fudge mixture down with the back of the spoon, making a small indentation in the fudge in preparation for the next step (adding the cookie dough ball). Set aside (no need to put in the fridge).
Cookie Dough Layer
- In another small bowl, combine tigernut flour, coconut flour, coconut milk, and honey. In a separate small dish, combine gelatin and water (make sure the water isn't hot). Immediately add the gelatin mixture to the cookie dough and mix well. Put the dough in the freezer for 5-10 minutes to firm up.
- Pull the cookie dough out of the freezer. Scoop little spoonfuls (about 1 tsp-1.5 tsp) of cookie dough and roll them into balls. Press each cookie dough ball into the center of the fudge cup. Once you've done this with all the fudge cups, place them on a cookie sheet or plate and put them in the freezer.
Cherry Layer
- If using frozen cherries, defrost them in the microwave for about 20 seconds, then add to a small food processor or blender (single serve blender cup recommended if using blender- see note below). Combine the coconut butter and cocout oil in a small dish and microwave for about 45 seconds (or until melted). Add to food processor along with the honey. Pulse mixture a couple times to start, then blend. Scrape down the sides as needed.
- In a small bowl, combine gelatin and water then immediately add the mixture to the food processor (or blender) and blend again until mixture is smooth.
- Pull the fudge/cookie dough cups out of the freezer. Spoon the cherry mixture (about 1-2 tsp) into each cup. The cups should be filled pretty close to the top.
- Place cups in the freezer again and allow to set (about 20-30 minutes) and they're ready to go!


Tess says
These are delicious!!
A lot of stirring, but worth it.
I added some salt, and also messed up the cookie layer by using coconut butter instead of the milk/cream lol. I ended up having to add a tablespoon of coconut milk to get it to mix. Pretty forgiving recipe!
When I make them again I will just press each layer into one big sheet and cut into pieces.
Thanks for the tasty treat!!
Arika | FoodCourage says
Hey Tess! Awesome- I'm so glad you like them. It's a bit of a process but I'm glad they turned out!